Lately many of you have been emailing us about getting our Remote Control product to work with Windows 7.
If you install the agent manually, or via an MSI group policy – not much to do, it should work right out of the box. Many of you like that automatic install feature, and Microsoft has put some roadblocks in your way to keep this from working.
Let me walk you through what you need to do to get this to work.
The first thing we need to allow access to is the admin share. This special share is automatically created when Windows is installed, but it is not available unless file and printer sharing is turned on.
This is disabled by default in Windows 7, and unfortunately Microsoft has yet again changed the method to turn it back on. The steps you need to take are now different than the ones you took in Vista.
How do you allow access to the admin share in Windows 7?
Start by going into the control panel.
Click on “Network and Internet”
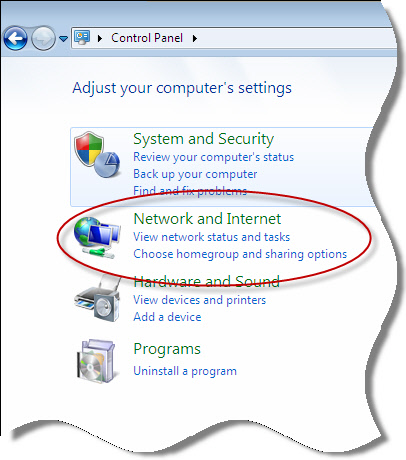
Then click on “Network and Sharing Center”
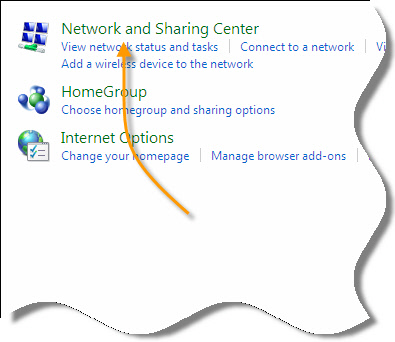
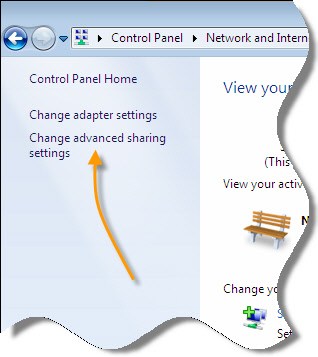
A new window will be displayed. Look on the left side.
See the item that says “Change Advanced Sharing Settings” – Click on it.
Now you are shown different profiles.
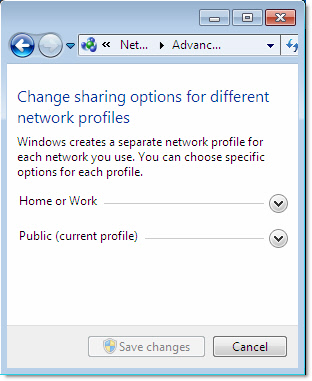
The list can change depending on how your system is configured. Windows 7 will determine automatically what profile your network card is using. You may want to enable file and printer sharing on all of them, or limit it to the “Home or Work” profile for higher security.
Expand the profile you want to modify, and scroll down until you see “File and Printer Sharing”
Click on “Turn on file and printer sharing”
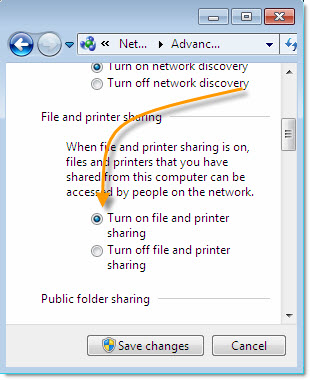
Save your changes.
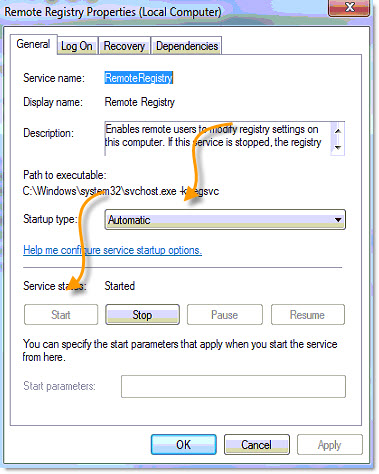
Now, we need to make sure the remote registry service is set to automatic and is started. Again, like the admin share, this is on the computer you want to control.
You need to open the service manager. You can do this by clicking on the start button, and typing “services.msc”. It should show up in the top of your start menu.
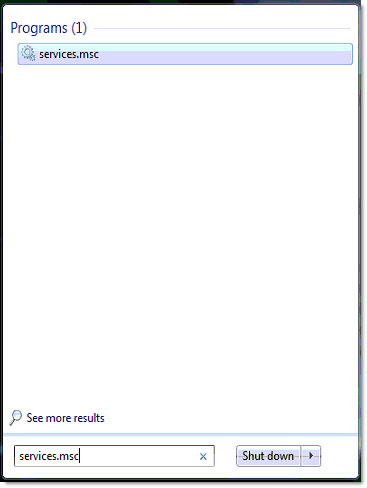
Click on it, and a window will open. Scroll down until you find the service named “Remote Registry”:
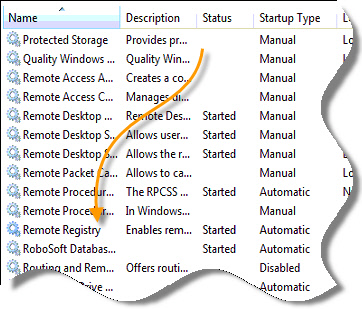
Right click on it, and go to properties. Change the service to automatic, and start it up:
I wish I could say that is all you need to do, but unfortunately you also need to make a registry change.
Open regedit, and drill down to this key:
HKEY_LOCAL_MACHINE\Software\Microsoft\Windows\CurrentVersion\Policies\System
Under this key you will need to create a new DWORD value called:
LocalAccountTokenFilterPolicy
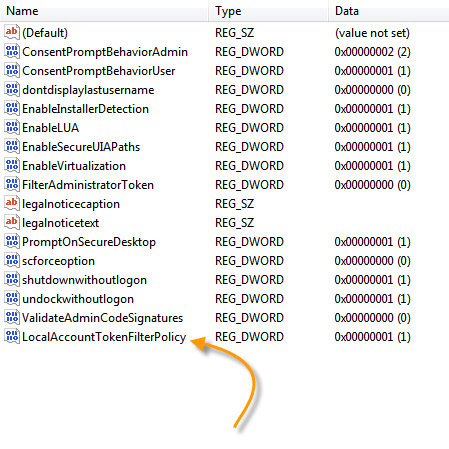
Set it to 1, and reboot.
Now the automatic install feature will work under Windows 7.
One more thing…Subscribe to my newsletter and get 11 free network administrator tools, plus a 30 page user guide so you can get the most out of them. Click Here to get your free tools

{ 2 comments… read them below or add one }
Thanks for this article Steve. We just upgraded to Windows 7 here, and I was just about to email you about the automatic install issue. Too bad MS made it such a pain.
No problem. It took us a while to learn all the steps to get it functioning…so I can see why so many people are having trouble getting this to work. On the plus side, once you follow the steps above…other remote apps will work too. Like those from SysInternals, and even stuff like connecting to a remote machine using the Service Manager, Regedit, or the Event Viewer.