Remote Control
Take control of computers across your network, or across the world. Remote Control allows you to control a PC as if you were there. Includes a blazing fast search to find computers quickly
Product Links
News And Tips
Remote Control Server Manual
Take a look at our quick start guide for simple setup. Below is the complete documentation for the server.
Table of contents
1. Server Status
2. User Accounts and VNC Support
3. IP Address Filtering
4. Connection Limits
5. Automatic IP Blocking
6. Listening
7. Logging
8. Silent Server Install
In the server settings application, the main tab shows all of the currently active connections, and allows you to enable or disable the server tray icon.
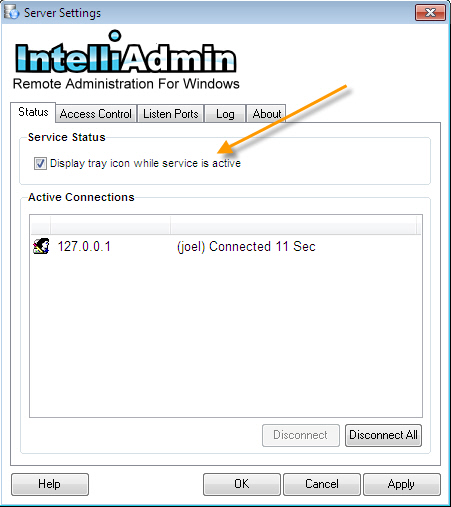
When selected, the server tray icon is displayed while the server is running.
When the tray icon is showing, you can click on it to display additional information and launch the settings application.
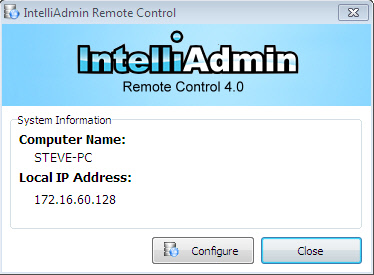
The configure button will load the server settings application. This can be disabled using the group policy inf file, or the remote control distribution tool.
Underneath the server tray icon option, the currently connected users are displayed:
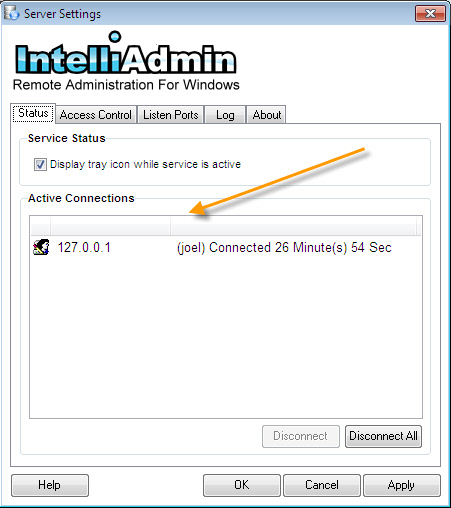
A connection may be terminated by clicking on the disconnect button while a user is selected, or disconnect all to force all connections to be terminated
Under the "Access Control" tab you can add, edit or remove users
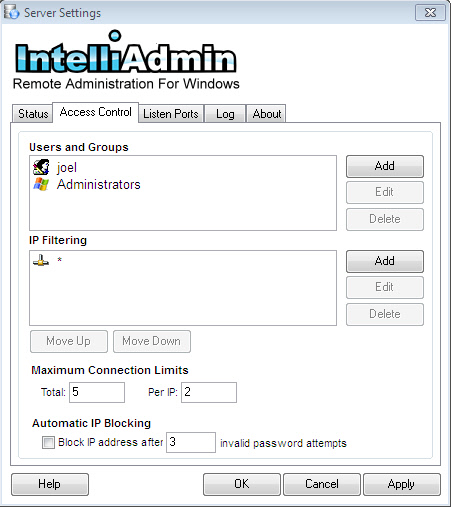
Do this by clicking on the appropriate buttons while that user is selected.
There are three user types: A Windows user, a standard user, and a VNC User.
Lets look at each:
Windows User – This is a windows user account. A windows user name, or group name. For example, if you created an active directory group named "Remote Users", you could put "Remote Users" in this field. Then any member of that security group could then connect to this machine
Standard User – This is an arbitrary username and password that you set. It allows you to create an access account that is not associated with any windows username or group.
VNC User – This user account allows VNC clients such as RealVNC, TightVNC, and UltraVNC to connect to the Server. It is a less secure method since the communications will not be encrypted. Also, since VNC does not accept a username, you need to make sure that each VNC account has a different password on the same machine. (Note: VNC Passwords are limited to 8 characters). All of these types of user accounts can have the same properties. Lets take a look at the user settings form of one user we added:
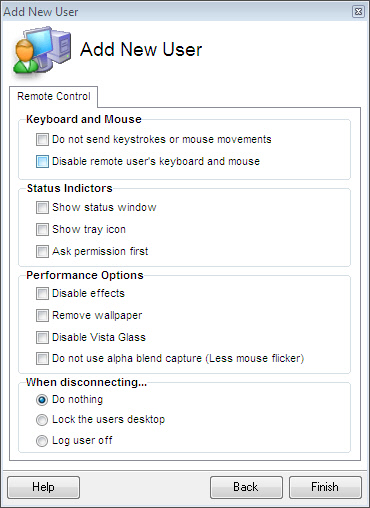
For standard, and Windows users these settings are used to override the client's preferences.
For example, if you wanted windows users in the "Remote Users" group to be forced to always ask permission before connecting, you would add this group and simply check the "Always Request Access Before Connecting" option above.
When those users connected, no matter what preference they have in their client, they would be required to ask permission before connecting.
Since VNC Users have no way of requesting these features, this form is used to determine the default behavior when they connect.
In the access control section you can block or allow connections with IP Address Filtering:
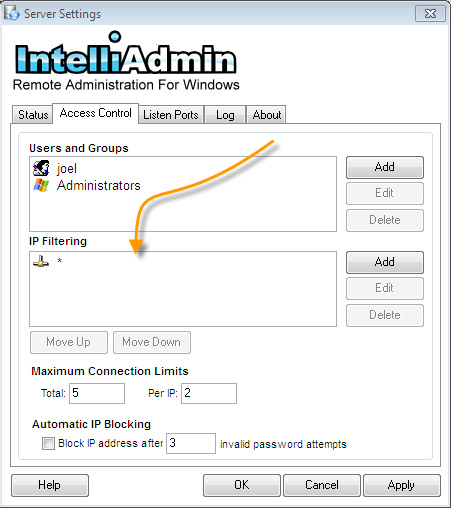
The rules are processed in order of how they are displayed in the settings window. If no Block or Allow match is found the Server assumes it must block the connection. Once a match is found, the Server takes the action requested (Block or Allow) and does not look any further.
The rules use simple wildcards like * and ?. A * represents any number of characters, and a ? represents a single character.
Lets say we want to block all connections from 66.134.103.194, but allow all others. We would first add a block rule of 66.134.103.194, and then an allow rule of *

If a rule is out of order, you can use the "Move Up" and "Move Down" buttons to position it properly.
Lets create another rule. We only want to allow machines in the 10.10.27.x network to connect to our machine. This can be done by having one rule that allows 10.10.27.*:

This implicitly blocks all other IP addresses because if there are no matches for an address, the Server will block the connection.
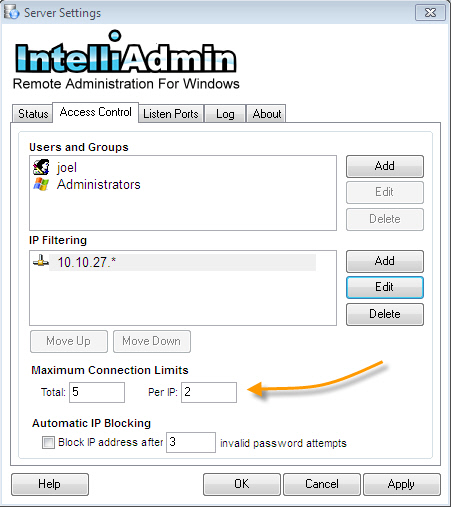
By default the Server limits the number of simultaneous connections to a total of ten, and a total of two per IP address. You can modify this by changing these settings:
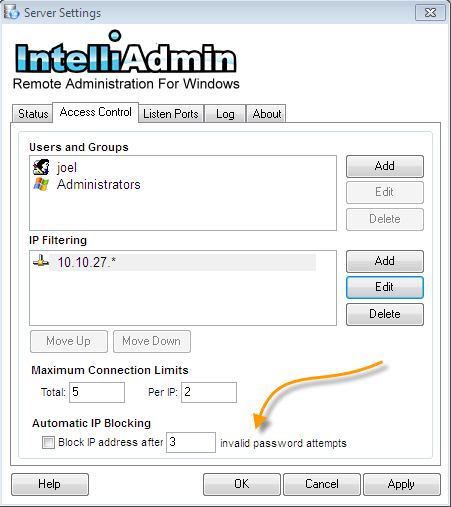
The Server can automatically block an IP address if a user attempts to connect, and sends the incorrect password too many times. When a user is blocked automatically the IP address is not added to the standard filter list. The blocked IP is added to an internal list, and is erased when the service is restarted, or 15 minutes has passed since the last invalid attempt.
The Server can listen on multiple ports, and different interfaces. By default the Server will listen on port 2792, and port 5900.
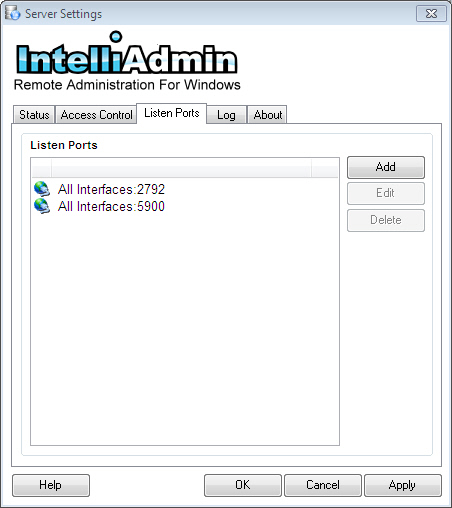
To see how this feature works lets look at an example machine that is connected directly to the internet with one network card, and connected to the LAN on another network card. We only want it to listen on the internal interface, and do not want it to listen on the outside. We simply delete the current listen ports, and add a new one with the interface set to the IP address of the local network:
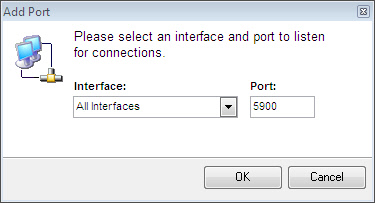
Add port 2792 if IntelliAdmin clients are connecting, and 5900 if VNC clients are connecting to the Server. After you add the interface, the server will only accept connections from clients that are on the internal network.
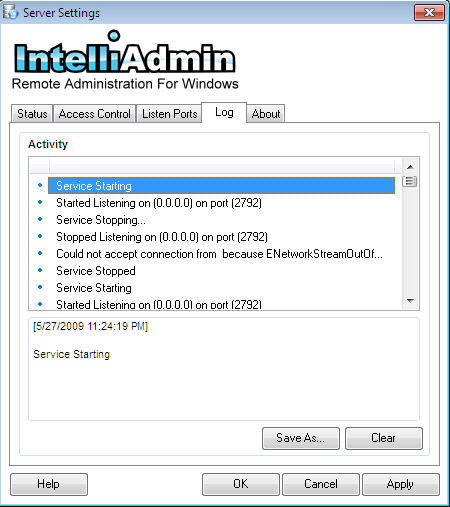
The server logs all connection actions. If a user is blocked by rules in the filter list, or automatically blocked because of too many bad password attempts – you will find it here. You can view the current status of the log on the "Log" tab of the Server settings. The logs are circular so it never can take up too much space on your hard drive. If you want to save the log to a text file click on the "Save As" button and save the log to the hard drive:
The server can be installed silently.
To do this, you will need to use this setup package: AgentSetup.msi
To get it to execute silently, use the /quiet option:
AgentSetup.msi /quiet
If no other options are specified, then these two default settings will be used:
-The Windows Administrators group will be added as a remote control administrator.
-The server will be setup to display the tray icon while it is active.
You can customize both of these using these command line arguments:
ShowTray = [TRUE/FALSE] - Shows or hides the server tray icon
User = "[Windows user or group]" - Sets the administrative group for the server
Some examples using these options:
Hide the tray icon:
AgentSetup.MSI /quiet ShowTray=FALSE
Hide the tray icon, and make the “IT Support” windows group allowed to access the machine remotely:
AgentSetup.MSI /quiet user="IT Support" ShowTray=FALSE
Note that the quotes are only needed around the user or group if they have a space in the name.
If you still have any questions please feel free to send us an email at: support@intelliadmin.com and we are glad to help.

